Module 3: Debugging
This module was much more straightforward than the prior. I am sure part of this is just the extra practice and increased understanding that goes with working through problems. I am glad that this module has been moved to earlier in the class so that we can find our problems in a systematic way.
During this module, we learned several ways to work through exceptions: Visual inspection of syntax, print statements, commenting out a line of code (or lines), and using the debugger tool in Spyder. I used all the tools throughout the exercise and assignment. Besides the visual inspection, I probably commented out several times to work through different versions of the script.
For Part 1, I just had to find two errors in the script. This was very easy, as this was just the warm up for the next two parts. When looking at syntax errors, the key is to consider indenting script properly and consistently, ensuring correct use of upper/lower case, symbols placement ("", :, etc.), and spelling.
 |
| Module 3, Part 1, Script 1 |
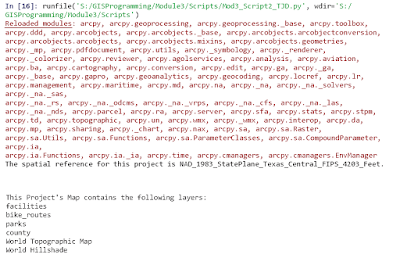
For Part 2, there were eight errors. These errors built onto the prior errors, but still contained many syntax errors. There was only one error that was a little difficult to find; however the debugger tool came in handy along with commenting out (using a #) and trying new lines of script. Once the script ran correctly, it printed out the names of the layers in the project's map.
 |
| Module 3, Part 2, Script 2 |
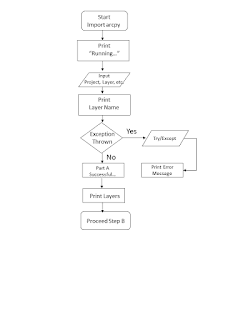
I was a little worried about Part 3 because it was the final step and I knew it would be the culmination of the entire module. For Part 3, we were expected to find an error, which was easy with the debugger tool. We were not supposed to fix the error, but use the try-except statement so that the script would execute with an easy to read statement and then continue to Part B. If correct, Part B would execute without error. The try-except statement was easy; however, it is imperative that you check your indenting so that those actions still remain within the script instead of outside. Below is the flowchart created to assist with this part.
 |
| Module 3, Part 3, Script 3 |
All my lessons learned are presented throughout this posting. A lot of this is just attention to detail. A big lesson learned for me was that everyone has errors and that many of the errors are simple spelling or punctuation mistakes. Look at those issues before deep-diving into the actual code. Additionally, the debugger tool is of great assistance.


No comments:
Post a Comment